Installing Windows 11 Pro from a USB may sound difficult, but it’s actually easy if you follow the right steps. Whether you're setting up a new PC or reinstalling Windows, this guide will walk you through everything — even if you’ve never done it before.
Let’s get started!
✔️ A USB drive with at least 8 GB of space
✔️ A computer with internet access
✔️ Your Windows 11 Pro license key (from KingLicenses.com)
✔️ A backup of your important files (optional but recommended)
Go to Microsoft’s official website: https://www.microsoft.com/software-download/windows11
Scroll down to “Create Windows 11 Installation Media”
Click Download Now
Plug in your USB drive
Open the installation tool you downloaded
Accept the license terms
Choose Create installation media (USB flash drive)
Select your language and edition (Windows 11)
Select USB flash drive
Choose your USB from the list and click Next
Wait while the tool creates your bootable drive
Insert the USB into the computer you want to install Windows on
Restart the computer
While it’s starting, press the boot menu key (often F12, Esc, or Del) — it depends on your PC brand
Select the USB drive from the boot menu
Press Enter
The Windows setup screen will appear
Choose your language, time, and keyboard settings → Click Next
Click Install Now
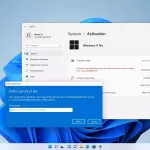
When asked, enter your Windows 11 Pro license key
Choose Custom Install if you want to start fresh
Select the disk where you want to install Windows
Click Next — Windows will begin installing
Once installation is done:
Choose your region and keyboard
Connect to Wi-Fi
Sign in with or create a Microsoft account
Set preferences and finish setup
Our support team is available 24/7 to assist you with setup or activation.
📧 Email: genuinekeylicenses@gmail.com
📞 Phone: +1 (305) 896-1926